ST-DH
1. Cleaning and Disinfection
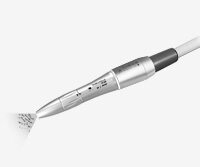
 Clean the parts in running water with a toothbrush.
 Clean the spray hole(s) with the spray hole wire, and rinse off the handpiece in running water.
Attach a suitable adapter to the WL-clean can. Insert the adapter into the handpiece connection end. Spray 3 times for 2 seconds each. Remove the handpiece from the adapter and place it aside. Wait for at least 1 minute for the cleaning agent to work effectively.
Attach a suitable adapter to the WL-cid can. Insert the adapter into the handpiece connection end. Spray for approximately 3 to 5 seconds. Remove the handpiece from the adapter and place it aside. Wait for approximately 1 to 2 minutes for the disinfectant to work effectively.
Attach a suitable adapter to the WL-dry can or WL-Blow. Connect the WL-Blow to the compressed air line properly.
Insert the adapter into the handpiece connection end. Blow compressed air for approximately 3 seconds.
 Wipe the whole handpiece with a piece of microfiber cloth (e.g., Toraysee for CE) that has been dampened with mikrozid AF liquid, FD322, or Rubbing alcohol.
2. Lubrication
*Be sure to lubricate the handpiece with the MORITA MULTI SPRAY after use with each patient.
*Be sure to lubricate the handpiece after the cleaning and disinfection steps or before autoclaving.
ST-DH
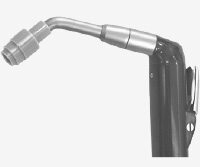
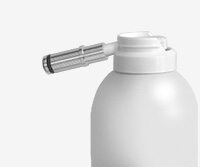 Put the spray nozzle on the spray can.
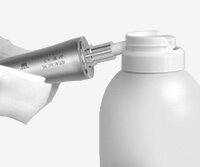 Insert the nozzle into the connection end of the handpiece, hold it firmly and then spray for about 2 seconds.
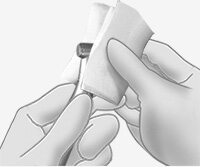
 Open the locking sheath before connecting the handpiece to the spray nozzle. (ST-DH)
(The spray will not be effectively delivered if the chuck is closed.)
3. Removing Excess Oil
* After handpiece lubrication, be sure to remove excess oil.
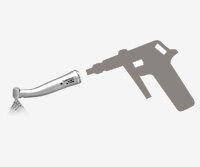 Using an air blow gun, blow the handpiece connection for 20 to 30 seconds to get rid of any moisture left inside the handpiece. Wipe the excess oil from the handpiece with a gauze.
 You can use MORITA's threeway syringe instead of an air blow gun. (In this case, attach the air nozzle to the tip of the threeway syringe. The air nozzle comes with a micromotor or its optional accessory.
ST-DH
 Close the locking sheath and point the handpiece down. Connect it to its motor and rotate it for about 30 seconds. Use a piece of gauze to wipe off any oil that gets on the outside of the handpiece .
4. Packaging
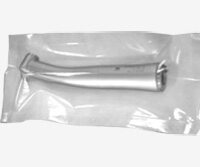 Make sure that the handpieces are not wet, and then put them in individual sterilization pouches.
Use only sterilization pouches that conform to ISO 11607.
Do not use any sterilization pouches that contain hydrosoluble adhesive ingredients such as PVA (polyvinyl alcohol). Otherwise, its adhesive ingredient may seep into the handpiece during sterilization, resulting in a solid residue that may cause a failure to rotate properly or poor water delivery. Note that even ISO 11607 conformable sterilization pouches may contain PVA.
5. Sterilization
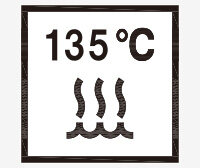 Autoclave the handpiece. After autoclaving, store them in a dry environment.
Recommended Temperatures and Time
| Sterilizer Type | Temperature | Time | Drying Time after Sterilization |
|
Pre-vacuum Type (Dynamic Air Removal, class B) |
+134℃ (273.2℉) | 3 minutes | 10 minutes |
|
Gravity Type (except class B) |
+134℃ (273.2℉) +121℃ (249.8℉) |
min. 6 minutes min. 60 minutes |
min. 10 minutes |


